
To Install Oracle Smart View in Your System
-
1
Download the files to your computer
-
2
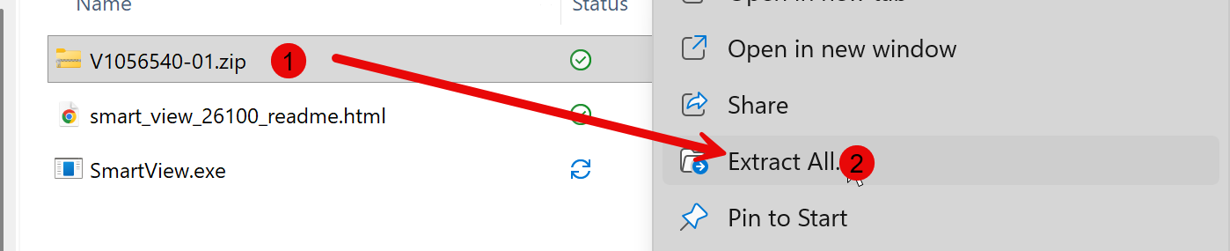
Unzip the file and get it ready
-
3
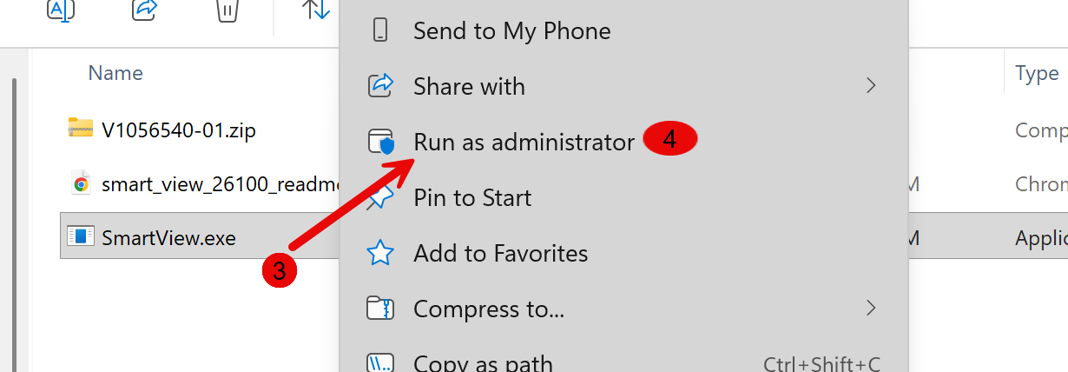
Right click on the SmartView.exe file
The action menu will expand.
-
4
Click on Run as Administator
IMPORTANT:
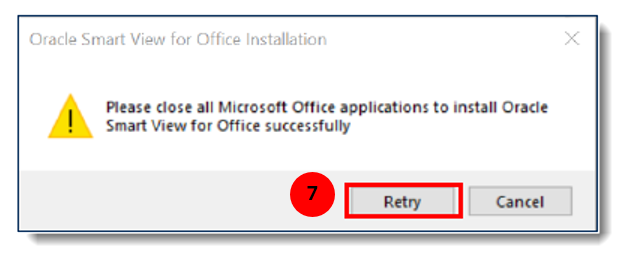
- You will be prompted to close all Microsoft Office Applications to install the Oracle Smart View for Office successfully.
- If you are not an administrator of your computer and it is managed by NCDIT, you will have to submit a ticket for new software installation.
-
5
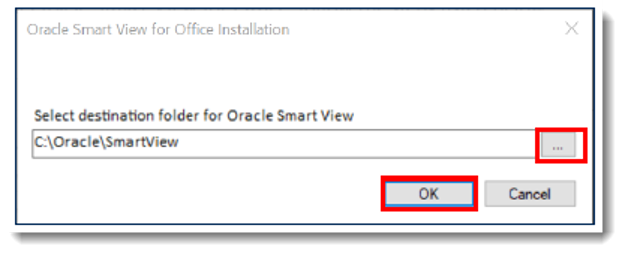
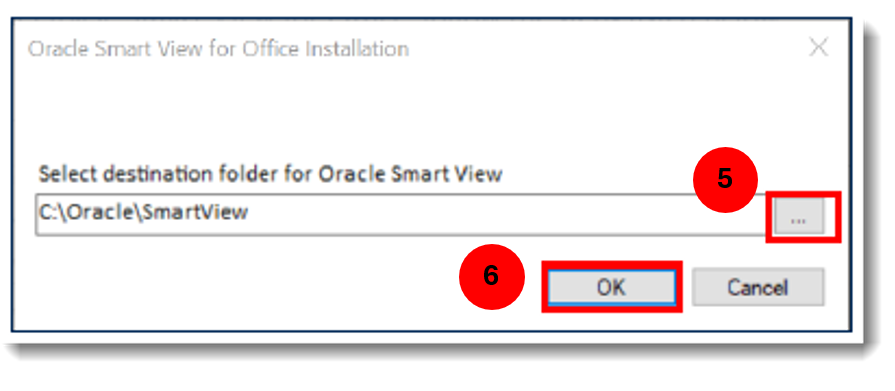
Select a destination folder
You will be prompted to select a destination folder. Keep the default folder as shown below.
-
6
Click OK
-
7
Close open Microsoft applications to install
If you have any other Microsoft applications open, you must close those applications and retry the installation.
-
8
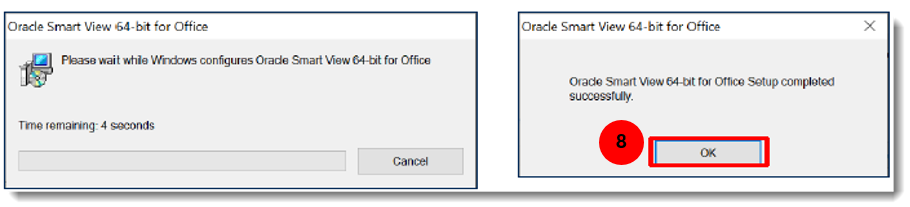
Once the setup is complete, a pop-up message will display confirming the setup completed successfully. Click OK.
The Oracle Smart View application will automatically install. The installation may take a few minutes while Windows completes the configuration. Once the setup is complete, a pop-up message will display confirming the setup completed successfully. Click OK.
-
9
Verify Smart View installation
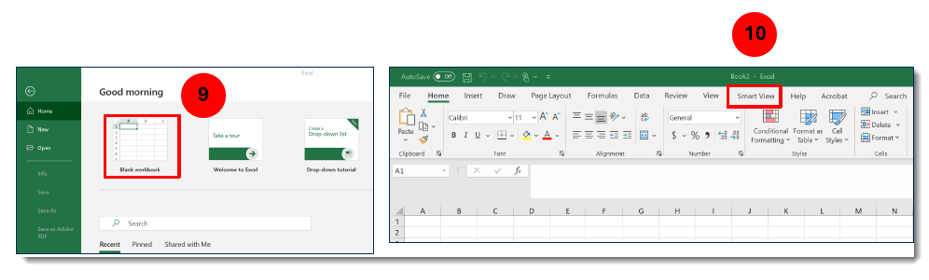
To verify the Smart View installation, open a new blank workbook in Microsoft Excel.
-
10
Verify that the Smart View tab now appears in the ribbon in Excel
-
11
Set up the shared connection between your Smart View and the BRIDGE application
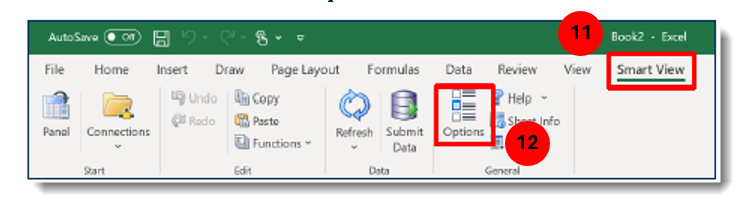
Click the Smart View tab in the Excel ribbon.
-
12
Under the Smart Tab, click Options
-
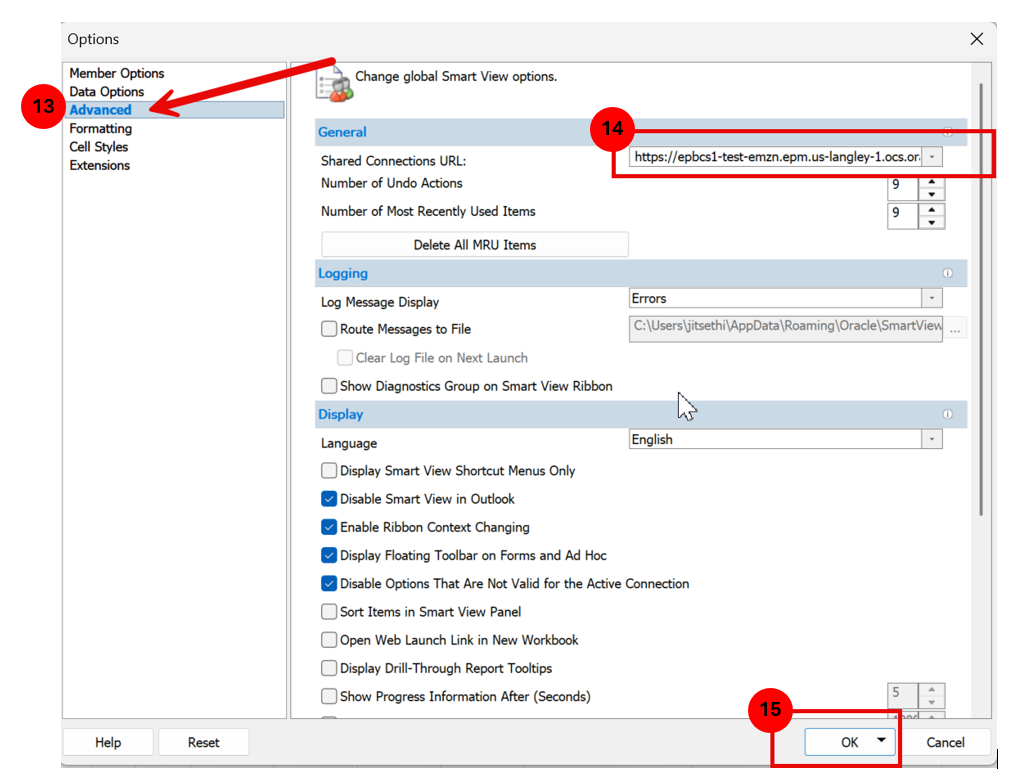
13
The Options window displays, click Advanced
-
14
Under the General section, locate the Shared Connections URL field. Replace the default link with the link below.
Connect to the Real BRIDGE Production Platform
https://epbcs1-emzn.epm.us-langley-1.ocs.oraclegovcloud.com/HyperionPlanning/SmartView Right click this URL and use "copy link address."
Do not use your keyboard shortcut to copy and paste. Do not copy the space after the URL.
Connect to the BRIDGE Training Platform (for training classes only)
https://epbcs4-test-emzn.epm.us-langley-1.ocs.oraclegovcloud.com/HyperionPlanning/SmartView Right click this URL and use "copy link address."
Do not use your keyboard shortcut to copy and paste. Do not copy the space after the URL.
-
15
Click on the triangle next to ‘OK’ which will show you more options
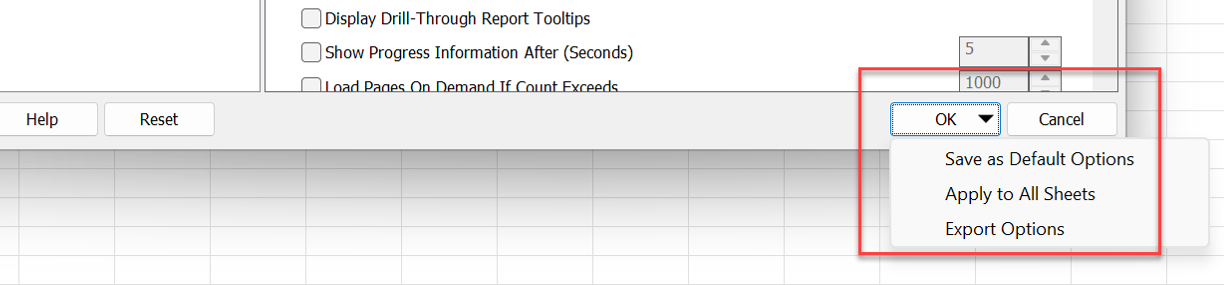
- OK - Select this option to apply only to the current sheet in the current workbook.
- Save as Default Options (Recommended) - Select this option to apply for all open excel sheets and all future Excel workbooks
The Oracle Smart View application is now installed and ready for use.
For instruction on how to use the tool, please refer to additional training materials (coming soon).